Painting in Progress - Yellow Orchids
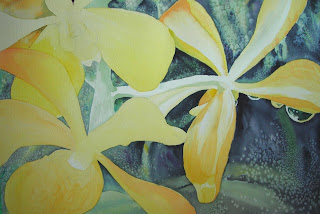
 This is what my orchid painting looked like this morning. I'll describe step-by-step the way I've painted it so far.
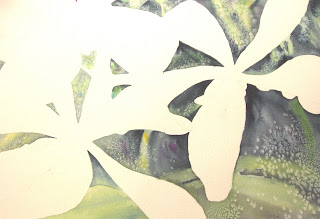
I did the beginning of the background yesterday, working a section at a time, wet-in-wet. I sprinkled coarse salt on the wet washes as the salt repels the pigment and creates a sparkly, starry effect. I will do some more glazes on the background so the salt stars are less distracting. I want the background to be darker in the end as well.
 My next step is to paint the first yellow layer on each orchid petal. I'm working on the petals one at a time, and trying to really study the photo to see which petals are lightest and which are darkest. Painting yellow is a bit like painting white - it's important to keep the lights light, and even more important to keep the "dark" tones (which are not very dark at all) from getting too dark and "dirty." There is not a lot of shadow on the orchids - the morning I took these photos everything was glistening wet from the downpour the night before and the sky was still overcast. Wade and I had stayed overnight at the resort for our 8th anniversary and when we went from our cottage to the restaurant (which is open-air) we got well and truly soaked, splashing through inches-deep water. In the tropical rainforest, when it rains, it can come down an inch an hour. By the time I toured the resort taking my flower photos, the only traces of the rain before was the droplets on the foliage, the ground having soaked up the moisture like a sponge.
I'll be continuing building up layers of yellow, adding some orange and raw sienna to really define the petals. Until I consider the orchids complete, I won't be touching the background again. I am trying to balance adding painterly touches like defined rather than blended washes with the smooth blending I find in the photograph. I am already pretty happy with the far right orchid, especially the bottom petal, and I'm about ready to work on the top left blossom. I'm also happy to see that the largest water droplet looks like a water droplet - sometimes when I am painting with my eyes just inches from my paper, it is hard to tell if I am achieving the effect that I want. Every time I complete another step in a painting, I try to prop up my painting board at a distance of several feet - and sometimes all the way across the room, so that I can really see the painting as a whole. That's also how it will be viewed when it is completed and framed, so stepping back and getting some distance just makes sense. Distance of time is helpful, too, so rather than painting for hours without a break, I believe in taking at least short breaks every hour or so, so that I can come back and view my painting through fresh eyes. My mom finds the green masking tape I use to secure my paper to the board disorienting, and she won't look at a painting until I've removed it, and even better, matted it. I did recently read a professional artist's opinion that the green of painters' tape skews the artist's colour sense, and that a neutral tone of tape (anyone make a gray tape??) should be used instead, to keep colour integrity.
